NEUE RINGELSOCKEN GANZ LEICHT – OHNE TREPPCHEN DANK PERLMUSTER, INKL. TUTORIAL

Wie ihr vielleicht schon einmal mitbekommen habt, LIEBE ich ja gute Zeitschriften. In unserem Wohnzimmer haben wir eine ganze Wand voller Zeitschriften. Und seit ich mit dem Stricken angefangen habe, stehen dort nun auch unterschiedliche Strick-Zeitschriften. Ich liebe es einfach diese (internationalen) Zeitschriften in die Hand zu nehmen, sie durchzublättern und mich inspirieren zu lassen. Da bin ich ganz froh, dass ich einen ganz tollen Mann habe, der meine Leidenschaft für den Print unterstützt und mich auch gelegentlich mit neuen Zeitschriften überrascht.
In einer meiner Zeitschriften bin ich so vor Kurzem über das einfache Perlmuster gestolpert. Ich sah einen Kurzarm-Pullover in Perlmuster und habe mich sofort in das Design verliebt. Mir gefiel diese schöne Struktur, die der einfach Wechsel aus rechten und linken Maschen erzeugt und konnte mir auch gleich richtig gut vorstellen, dass dies ein ideales „Muster“ sei, um handgefärbte Wolle toll in Szene setzen zu können.

Für alle, die ein Perlmuster vielleicht noch nicht kennen, eine kurze Zusammenfassung, wie man dieses strickt:
1. Runde/Reihe: 1M re, 1M li, 1M re, 1M li …
2. Runde/Reieh: 1 M li, 1Mre, 1M li, 1 M re …
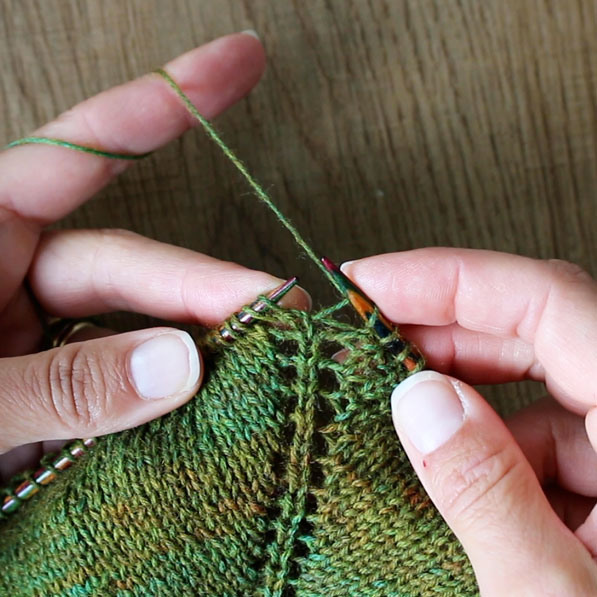
Ihr seht, man strickt einfach jeweils eine Masche in rechten Maschen und eine in linke Maschen und wiederholt das, so oft wie nötig. In der folgenden Runde/Reihe strickt man dann wieder nur rechte und linke Maschen, allerdings gegengleich. Das bedeutet, jede rechte Masche, die man zuvor gestrickt hat, wird nun links gestrickt und jede linke Masche wird rechts gestrickt. Und das war es dann auch schon. Das Perlmuster ist leicht zu merken, lässt sich super einfach stricken und gibt dem Strick-Objekt eine tolle stabile, dreidimensionale Struktur.

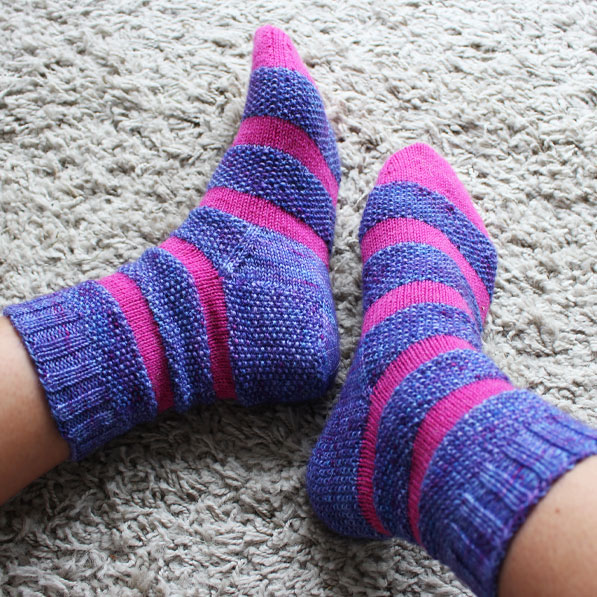
Da ich erst vor einiger Zeit ein blau-lila Sockengarn selbst gefärbt hatte, wollte ich das Perlmuster doch gleich einmal mit dieser Wolle in einem neuen Socken-Design testen. Denn kleine Projekte gehen ja immer, oder?
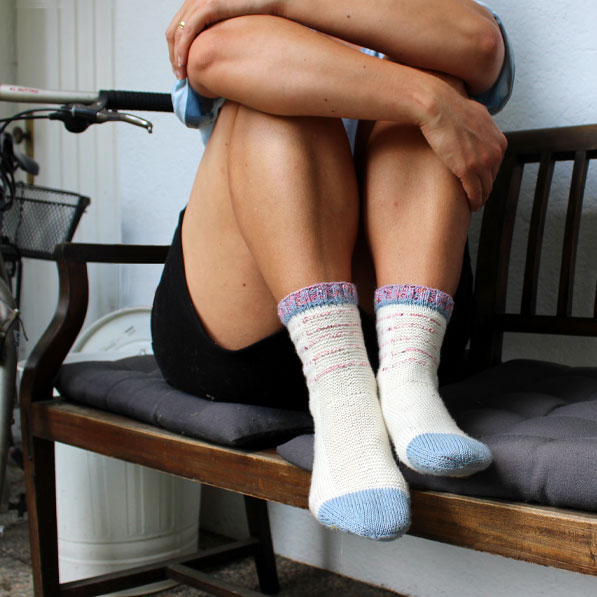
Das Grundmuster meiner Socke stricke ich von Anfang an nach der REGIA Sockentabelle. Die Socken in Größe 40/41 passen mir einfach perfekt, warum sollte ich daran also etwas ändern? Für mein nächstes Socken-Projekt wollte ich das Perlmuster als besonderes Element in eine knallige Ringelsocke aus meiner blau-lila Wolle und einem Hot Pink integrieren.
Eigentlich sind Lila und Blau gar nicht so meine Farben, aber bei meinem letzten Färbe-Versuch habe ich einfach etwas herum experimentiert und mit dem fertigen Ergebnis war ich tatsächlich ganz happy. Also habe ich das Garn zum gebrauchsfertigen Knäuel gewickelt und mich gleich auf die Suche nach einem Kontrastgarn gemacht. Das „Hot Pink“ von Lana Grossa fiel mir dazu sofort in die Hände. Was für eine Farb-Kombination. Wenn das mal nicht Barbie-Alarm schreit!


Beim Stricken viel mir auf, dass die Kombination aus unterschiedliche Streifen in „glatt rechts“ und in „Perlmuster“ einfach genial ist! Denn dank dem dreidimensionalen Effekt des Perlmusters muss man sich überhaupt keine Gedanken über den Farbwechsel machen. Es gibt vielleicht 1-2 Dinge, auf die man generell achten muss, aber man muss keine Tricks anwenden, um stufenlose Streifen stricken zu können. Ist das nicht toll?!? Die Socke ist also definitiv absolut Anfänger-freundlich.
Und damit ihr nun genau wisst, wie ihr meine neuesten Ringelsocken mit Perlmuster stricken könnt, habe ich euch extra ein kurzes Video dazu aufgenommen. In meinem 9. Strick-Tutorial auf meinem YouTube Kanal zeige ich euch, wie ich meine knalligen, Barbie-inspirierten, Streifensocken OHNE Stufen beim Farbwechsel stricke.
Viel Spaß beim Ansehen und Nach-Stricken!
Und denkt daran, wenn euch das Video gefällt, dann gebt mir doch bitte ein „LIKE“ und ABONNIERT meinen Kanal.
Für meine Ringelsocken verwende ich folgende Materialien (alle selbst bezahlt):
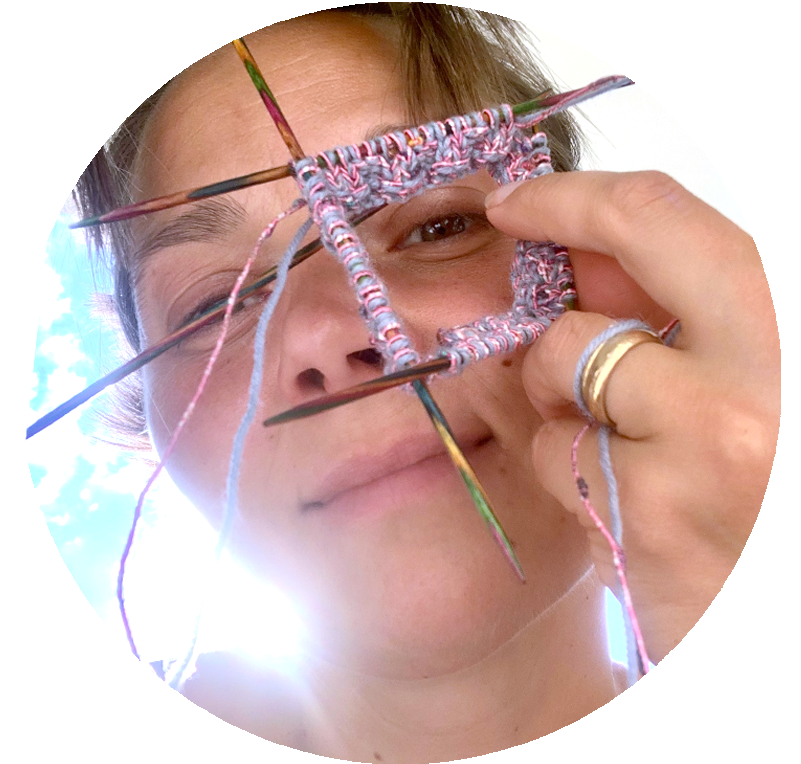
Nadelspiel: Symfonie von Knit Pro, Nadelstärke 2,5
Blaue Wolle: Selbst gefärbte Sockenwolle
Pinke Wolle: Sockenwolle Cool Wool 4 Socks Uni von Lana Grossa, Fuchsia (7717)